Showing posts with label all things crafty. Show all posts

Sunday, 20 April 2014

Craftseller free papers challenge

Well I thought I would set myself an Easter challenge.  I was given a subscription to Craftseller (a fantastic mag) for Christmas and this months issue came with some lovely free papers.  So rather than stashing them away for a rainy day I decided to challenge myself to see how many projects I could create with the papers.  Here is a picture of the things I have made so far.  Believe it or not there is plenty of paper left to create some more things!

I created a flower exploding box card, a 5" smash book, a mini book and a photo box!


This mini book uses one peace of 6"x12"  paper.  I have used thin card to make the cover, then covered with one of the lovely papers.


This little box comprises of two oragami folded boxes hinged together.  There is a magnetic strip around it.


Once opened ...


... there is a concertina mini photo album!


Here is the smash book I made.


Some pages contain tabs.  


There are even some little pockets!

Well what do you think??? I loved this challenge and has been a lovely way to spend a few hours!

I wonder what else I could make with the left overs?!?

xxx

Tuesday, 15 April 2014

A Craftea Afternoon

Well the sun was shining and the door flung wide for our Craf-tea afternoon.  The wind didn't enable us to enjoy it outdoors unfortunately but we still had great fun.  Today we made Easter Baskets and Easy Peasy boxes! Not to mention eating cake and drinking tea! (it's amazing what you can do in two hours!)
Here are some photos, they seem a bit dark i'm afraid, as despite the sun, the shades I had put up outside cast quite a shadow.

Some of the creative chaos...


... but look what we made!

Thank you so much girls for coming along.  Hope the bingo winners enjoy their kits!


Sunday, 13 April 2014

BOOM!

I am really loving these exploding boxes!  Here is another exploding experiment. 


Inside the innocent looking box is ...


...another little box and inside...


boom! 

This exploding box has 8 opening layers, each one is rotated slightly to add an interesting effect!  The box in the middle could reveal an Easter treat! Maybe a chick or a small egg! Mmmmmm  (there isn't one here because if I bought one I would more than likely eat it before it got to having its photo taken!) 

Tuesday, 8 April 2014

Latest crafty endeavours!

Well the creative juices have been flowing in our house today and being that it is the school holidays I have had a very willing assistant.  Today's task was to create as few different samples for upcoming workshops!  I think I have unleashed a demon in the process however.... paper creations everywhere!

Exploding Photo box


Inside the box are a selection of pages to flip forward and back, each containing photos or journalling.

6"x 6" variety boxes

Each of these three boxes are created using the same 6" x 6" card stock!  Just to show you the variety of sizes that can be created when you start with the same size card.


Small accordion photo box


Take off the lid ...


Open the sides to reveal two tabs ...


Pull them out to reveal an accordion photo album in each half!


There will be more coming soon I expect so keep checking back for more!!

Sunday, 30 March 2014

Exploding Boxes!

Well I have been slowly preparing another workshop!  It isn't quite ready to test on willing crafters but here is a preview of some of the exploding boxes I have made!


Here is an unexploded, exploding box!  You lift the lid off and ....


The inside pings open to reveal a bunch of flowers.


This exploded box contains a 3D Christmas tree.

I do have a few more ideas for a few other designs so  watch this space and don't forget if you are Dorset  based and wish to book a workshop please don't hesitate to contact me.

Monday, 24 March 2014

More Handbags at dawn!

Here are the latest wonderful creations from the WI.  Such creativity!

Thank you ladies for a lovely workshop.


Wednesday, 19 March 2014

Latest Crafty Workshop!

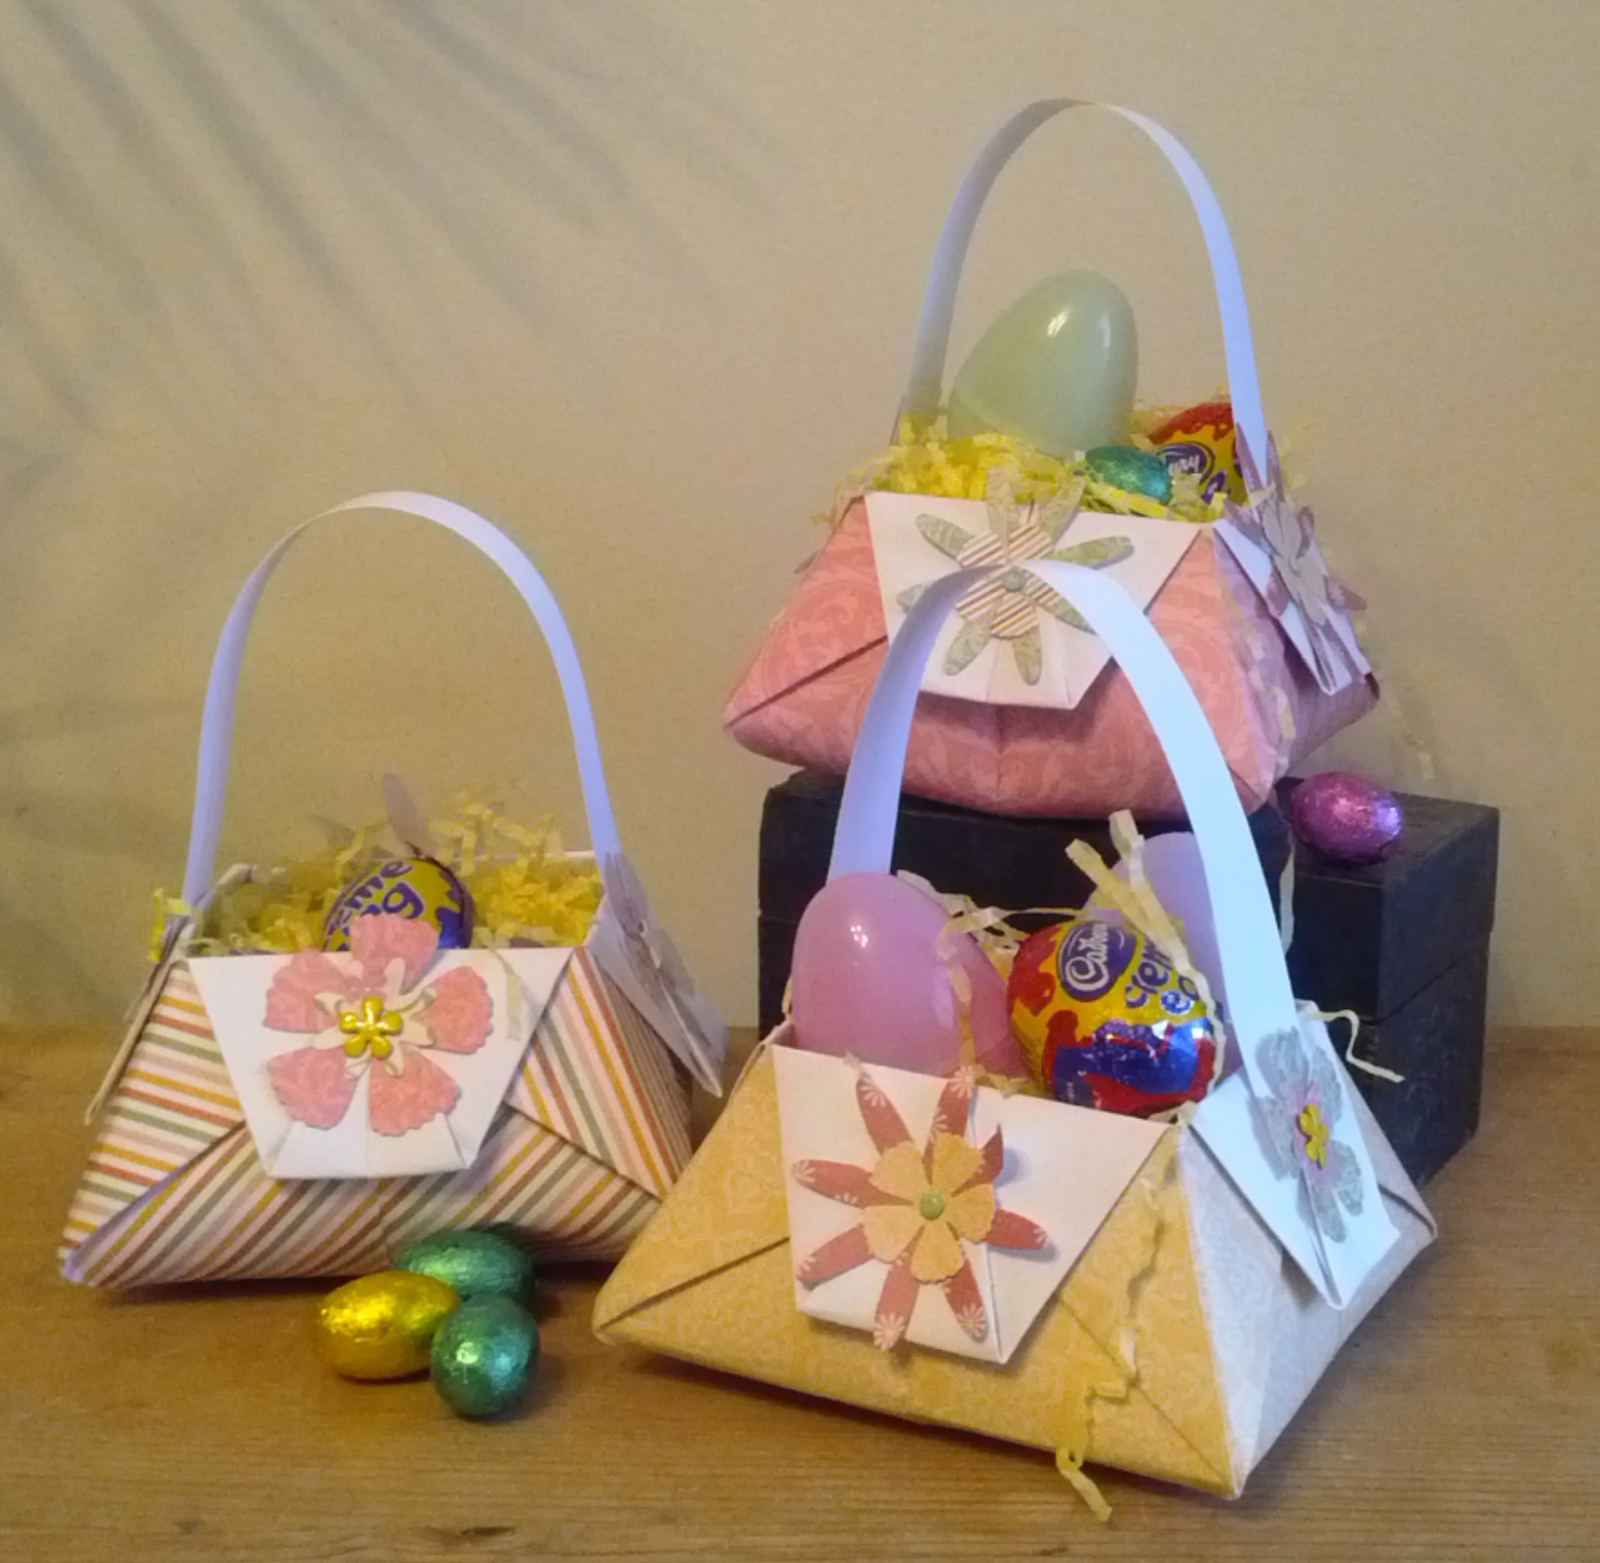
This Monday I was invited by the lovely Wimborne WI to demonstrate how to make 'Handbags and Manbags' and 'Origami Easter baskets'!  Was such a lovely time.  Here are their wonderful creations! 


Some very creative bags.  My favourite part of any workshop is watching all that creativity evolve.
Here are a few baskets I made in preparation for the workshop.


Just so you know ... The cream eggs didn't survive the journey!  (actually they never made it to that day!)
These little baskets are so easy and fun! I have made a few kits for people to buy so they can make their own.  Kits contains enough papers and cut flowers to make 2 bags! Oh and instructions of course!

Well another workshop booked for next week, hopefully this will go just as well.

Thank you Wimborne WI for a lovely afternoon.


Thursday, 3 October 2013

Handbags at dawn!

Well it was nearly handbags at dawn! I was up early enough preparing some of these beauties for a craft demo I gave today for the lovely ladies of the Dorchester WI.  

What a fantastic few hours with a lovely bunch of ladies making these bags.  I really wish I had taken photos of their creations as there were some truly wonderful bags made.  These humble offerings were mine.  The larger ones are made from 12x12" scrapbook heavyweight papers, the middle sized one was 9x9" and the baby one 6x6".  The card you can see was an example of the cards we made to go inside!

Also hidden among these luscious girly bags is a 'man bag' (without a handle!) it is meant to look like a mans shirt, the tie lifts with the collar to reveal the box inside.  The paper I used for this was 12x11".

'But what could I do with them? I mean they look nice but...' I might hear you say.  Well in the past I have bought large tins of sweets and split them up between the bags so my daughter can give them as thank you presents to her teachers.  (that is if there are any sweets left I have tested a few out...wouldn't want to give them gone off sweets would I!)  Other ideas? maybe you could roll up a pair of socks, or pop in a lipstick and a mini tube of hand cream.  I occasionally sell my jewellery in them as they provide a good open space inside and look fab.

If you would like to see how to make these bags I did a tutorial a few years ago which you can find on this blog under tutorials, or follow this link http://alltcrafty.blogspot.co.uk/2011/07/handbag-tutorial.html there are a few differences as I have developed the design since creating this video.

Happy bagging!!!!

Monday, 28 January 2013

New Images

Well here they are! A selection of my latest photographs.  It has been quite a journey but I am really pleased with these results.  Trouble is I have sussed the bracelets but what of my bags and bunting, not to mention the necklaces!!  I think it is back to the researching for more ideas.


Only Question I have now however is how many times should you use the same prop??

xx

Saturday, 26 January 2013

Taking better photographs

Photographs

Oh my have these given me a headeache!! Taking decent photos is such a must to showcase your work, I know this, but how on earth are you meant to achieve this??

My original attempts involved laying each piece in an IKEA wooden bowl, such an inexpensive item, but I loved the effect.  Here is one of my first pictures ~
  

I still like it to be honest as it feels more natural, more in keeping with the recycling theme. That said however, the image doesn't show the bracelet to it's full potential, the flowers are lying  flat on the surface where as they wouldn't do this on your wrist.  I was also advised to photograph my pieces on white.

My next attempt was to use a white surface.  I wandered around the house with my white scrapbook page, bracelet and camera in search of some decent light.  The best room for light in undoubtedly the conservatory , although with the snow fall the roof was so dark that it didn't work too well.  Here is my next attempt (actually there were several before this one but silly me deleted them, so I can't show you how awful they were!)

This just looks so bland and too dark.

So my next attempt involved lots of research, I found some fab blogs, these were  great help not just by the articles but also demonstrating well taken images of their products.


I decided I needed to get a white vase, this would help give a little dimension, I also felt I needed a much larger piece of paper so that it will cover the surface area better and provide a vertical back drop aswell in one continuous piece.

I set up a small area in the conservatory, fixing a large length of paper to the windows so it draped down onto the table and covered the workspace.  I then put my new little vase in the centre and experimented with positioning.  Here is the results!


I like this, but the light was still a little dark.  I don't own any exciting photoediting software so wasn't sure what to do, I could alter the brightness and contrast but that was about the most I could do.

Until ......

I was browsing and saw a post by All She Crafts, she had recently discovered an online photo editing software called Pic Monkey.  What a program, I just inserted my pic, played around with some of the settings and produced this!!! 

It is cropped as well as the colours brightened and saturation changed. 
Here are the two images side by side so you can see the difference!


What do you think?? I am really pleased with the results.  Next task is to find a vase big enough to showcase my earrings better!

Thursday, 8 November 2012

Red Flower bag commission


Well nearly the end of yet another week and a week closer to my due date! arghhhhh!  Still managed to get a little crafting done this week!  Here is my latest bag, a commission for a very good friend.  


 This two tone flap over bag is so great! I am just so pleased!  The bag is all padded with adjustable straps and as always recycled from reusing fabric!  Even the buckles and buttons are recycled.


This is the inside, showing the pocket detail and the two tone effect with the fabric!


This is my second go at a flap over bag and I have been so pleased with the results.  The only thing I really need to combat now is the fastening, It really needs to be adjustable so it can fasten no matter how much is in the bag! That will have to be my mission for the day!

My main intention for this lovely Thursday is to relax and play with my new birthday present! a Sizzix! something I have had my eye on for years! I am so excited! I def need a slow day so a quite crafty one will be ideal!  I am sure I will post some more creations soon!


Sunday, 4 November 2012

Latest Upcycled bag!

Well what a creative morning! Short of nearly destroying my old sewing machine I managed to create this bag! I am really pleased with how well it turned out.


The dimensions are approx 30x20x12cm and has an internal pocket and security clip.  Everything except the thread and wadding are upcycled so a mega eco bag!!

The design was partly an existing design I had made up earlier this year, an addition of production from another pattern I had acquired and then further adapted to make the handle adjustable and the flap over the front! Really wasn't sure how it would turn out but thrilled with the result!

Now all I need to do is make a note of what I did so I can make another one! lol

Another recent make I keep meaning to share was a commission I did last week, I couldn't blog about it until the birthday girl had received it but as she has now here goes!


A pink bottle flower necklace with matching earrings.  The necklace has a little extra something however and there are little dancer charms around it! Especially for a dancer!  Sorry the pictures aren't great, I finished it late at night and had to post first thing so no time for good light! still hopefully you can get the general idea.  Here are the dancer charms close ups.